Cleaning the caulk around your toilet isn’t exactly a task that you’re thrilled to do.
However, maintaining a hygienic and clean bathroom is crucial, and poorly maintained caulk can lead to mold and mildew growth, which poses a health hazard. Not only that, but unsightly caulk can also ruin the overall look of your bathroom.
Fortunately, cleaning caulk around your toilet is easier than you might think.
In this post, we’ll provide you with all the tools and tips necessary to get the job done like a pro.
Our step-by-step guide will walk you through everything from selecting the right cleaning supplies to tackling stubborn stains. We understand that nobody wants to spend hours scrubbing their bathroom, so we’ve made sure our expert advice on how to clean caulk around a toilet is quick and effortless.
Plus, we’ll share some best practices and tips to help keep your bathroom looking fresh for longer.
Are you ready to transform your bathroom into a sparkling oasis of cleanliness?
Buckle up because we’re about to show you how easy it is to clean caulk around your toilet like a pro.
Contents
What is Caulk and Why it Needs to be Cleaned
When it comes to protecting your bathroom from water damage, caulk is the unsung hero.
Acting as a waterproof sealant, it prevents water from seeping into gaps between your toilet and the floor. But just like any hero, caulk needs maintenance to remain effective.
Over time, constant exposure to water, moisture, and dirt can cause it to become discolored, cracked, or even moldy. That’s why regular cleaning of caulk around the toilet is essential.
Neglecting to keep your caulk clean can lead to costly repairs and potential health hazards due to the growth of harmful bacteria and mold. Think of caulk as the knight in shining armor protecting your bathroom from water damage.
But just like any armor, it needs to be maintained to ensure its effectiveness. Cleaning caulk around the toilet may seem intimidating, but with the right supplies and precautions, it can be a simple process.
You’ll need a putty knife, utility knife, scrub brush, warm soapy water, bleach, and gloves to protect your skin from harsh chemicals.
Firstly, remove any loose or damaged sections of caulk using a putty or utility knife.
Next, clean the area thoroughly with warm soapy water and a scrub brush to remove any dirt, grime or mold that may have accumulated on the surface. Rinse the area thoroughly with clean water and dry it with a towel before applying new caulk.
When applying new caulk, make sure to use a gentle cleaner that does not contain harsh chemicals that can damage the caulk or surrounding surfaces. Cut the tip of the caulking tube at an angle and insert it into a caulking gun.
Squeeze the trigger of the caulking gun to apply a thin and even bead of caulk around the base of the toilet. Smooth out the caulk using your finger or a damp sponge and remove any excess.
Allow it to dry completely according to manufacturer instructions. In summary, caulk is the unsung hero of your bathroom, preventing water damage, and leaks around your toilet.
Gather the Supplies Needed for Cleaning Caulk
Cleaning caulk around a toilet may seem like a daunting task, but with the right supplies, it can be an easy and satisfying job.
Just like a knight needs his armor to protect him, you need the right tools to protect your bathroom from water damage and potential health hazards.
Rubber Gloves
First on your list of supplies is a trusty pair of rubber gloves – the unsung heroes of any cleaning project.
These gloves will keep your hands protected from harmful bacteria and chemicals found in cleaning products.
A Scraper
A scraper, which helps to remove any old caulk or debris on the surface before applying a new layer of caulk.
When it comes to cleaning solutions, you have two options: bleach or vinegar. Both are effective cleaners for removing mold, mildew, and stains from caulk around the toilet.
Make sure to use caution with these products and follow the instructions on the label. You’ll also need a sponge or cloth to apply the cleaning solution and wipe away any dirt or grime.
A clean sponge or cloth is essential to avoid spreading germs around your bathroom.
Replace Old Or Damaged Caulk
Finally, you’ll need a caulking gun and caulk to replace any old or damaged caulk once the cleaning is complete.
This step is crucial to preventing water damage and keeping your bathroom looking brand new. By having all of these supplies on hand, you’ll be well-equipped to tackle your toilet’s caulk effectively and efficiently.
Removing Old Caulk
Today, we’re going to tackle the crucial task of removing old caulk around your toilet.
Just like a warrior preparing for battle, you need to arm yourself with the right tools and techniques to protect your bathroom from water damage and nasty odors. To start, grab your trusty utility knife or caulk removal tool and carefully slice through the old caulk.
It’s important to be precise, like a skilled swordsman, so you don’t damage any surrounding tiles or fixtures. Once you’ve made your cuts, use a putty knife or scraper to pry up and remove the old caulk.
But wait, there’s more. You need to ensure that the area is thoroughly cleaned of any leftover residue or debris.
A cleaning solution like vinegar or rubbing alcohol can do the trick.
Simply apply it to a soft cloth or sponge and wipe down the area until it shines. Don’t forget to let the area dry completely before applying new caulk.
You don’t want any sneaky moisture hiding in the shadows, ready to cause trouble later on. If you’re in a hurry, use a hairdryer on low heat to speed up the process.
Now comes the fun part – applying your new caulk with a trusty caulking gun. It’s like channeling your inner artist and adding the finishing touches to your armor before heading into battle.

Use your finger or a tool to smooth out the caulk for a clean finish. In conclusion, removing old caulk around your toilet may not be glamorous like being a knight, but it’s just as important in maintaining a clean and healthy bathroom.
With these simple steps, you’ll be well-equipped to conquer this task like the bathroom warrior you are.
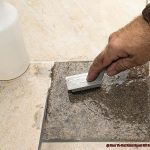
Cleaning the Area Thoroughly
Don’t be intimidated – with the right cleaning tools, it’s a battle that can easily be won.
Think of yourself as a knight preparing for battle, armed with a trusty sponge, bucket, water, cleaning solution, and scrub brush. Start by removing any loose debris or dirt with a dry cloth or sponge.
This step is crucial to ensure that you’re not just pushing dirt into your caulking lines. Once the initial layer of grime is cleared away, mix your cleaning solution with water and pour it into the bucket.
Dip your sponge into the cleaning solution and begin wiping down the caulk lines thoroughly. Just like an artist adding finishing touches to their masterpiece, take care to cover all areas of the caulk – including those hard-to-reach spots where dirt and grime love to hide.
If you come across stubborn stains or mildew, don’t panic – your trusty scrub brush is here to save the day. Gently scrub away at those pesky stains until they’re no longer visible.
Remember to be gentle so as not to damage the caulk. Rinsing is up next.
Use a clean sponge or cloth to rinse the area with clean water and remove all traces of cleaning solution from the caulk lines. This step is vital in preventing future buildup of dirt and grime.
Just like how a knight must keep their armor dry to prevent rusting, drying the area prevents any moisture from accumulating around the caulk and causing mold or mildew growth.
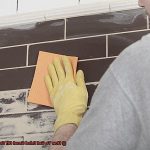
Applying New Caulk
It’s a vital step in maintaining a clean and leak-free bathroom.
So, let’s dive into the steps required to get the job done right. First things first, gather all the necessary tools: a scraper or putty knife, cleaning solution, high-quality silicone caulk, and a caulk smoothing tool.
With your tools in hand, you’re ready to begin. Before you start applying the new caulk, ensure that the area is entirely dry and free of old caulk or debris.
Use your scraper or putty knife to remove any excess caulk carefully. Then, use a sponge and mild detergent and water to clean the area thoroughly.
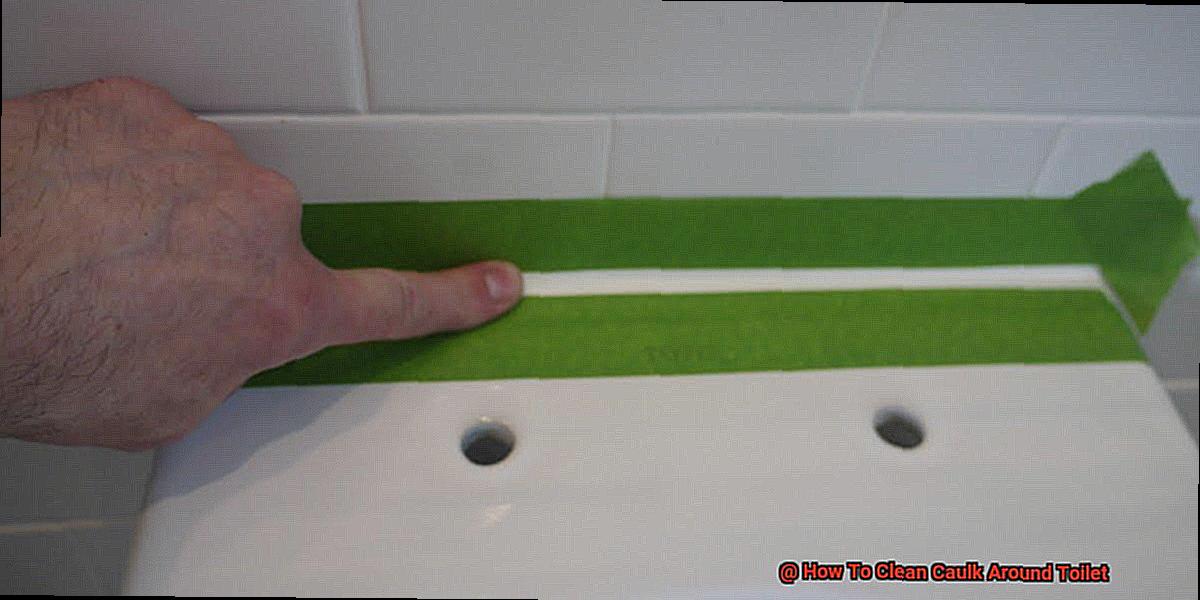
Now it’s time to apply the new bead of caulk around the base of the toilet. Start at one corner of the toilet base and work your way around slowly while applying a continuous bead of caulk.
Remember to use enough caulk to fill the gap between the toilet and the floor but not too much that it overflows or becomes messy. Once you’ve applied the caulk, use your finger or a caulk smoothing tool to smooth out any bumps or ridges in the caulk.
This will create a clean and professional-looking finish. Don’t underestimate this step as it can make all the difference when it comes to achieving a seamless result.
Lastly, allow the caulk to dry entirely before using the toilet or exposing it to water. Depending on the type of caulk you are using and humidity levels in your home, this typically takes around 24 hours.
Remember that patience is key when it comes to drying time; rushing may lead to uneven or lumpy caulk. In conclusion, applying new caulk around your toilet doesn’t have to be overwhelming.
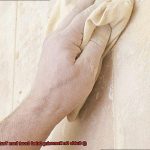
Finishing Touches
You’ve successfully caulked around your toilet, and now it’s time to add the finishing touches to make it look brand new. Think of it like the final touches on a masterpiece painting – the details make all the difference.
First and foremost, make sure to let the caulk dry completely before using the toilet. This is like waiting for the paint to dry on a canvas.
The drying time can vary based on the type of caulk you use, so be sure to read the instructions carefully. Once it’s dry, take a damp cloth and gently wipe away any excess residue or smudges.
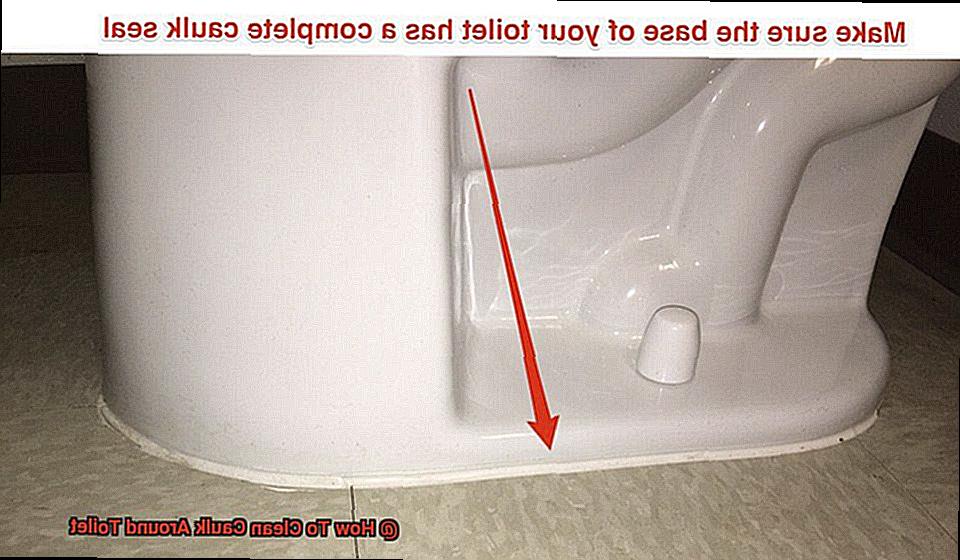
You don’t want to ruin your hard work by leaving behind any unsightly marks. Next, ensure that there are no gaps or unevenness in the caulk.
Think of this step like using a fine brush to touch up small details in a painting. A caulking tool or your finger will work wonders in smoothing out any imperfections.
By doing this, you’ll prevent water or dirt from collecting in any gaps, which can cause damage or mold growth. It’s important to keep your bathroom well-ventilated as well, just like how a painting needs proper ventilation to dry properly.
This will help the caulk dry faster and prevent mold growth in the long run. Lastly, periodic maintenance is crucial in ensuring that your caulk job lasts for years to come.
XaprC-_Qavw” >
Conclusion
In conclusion, cleaning the caulk around your toilet is a necessary chore to keep your bathroom clean and hygienic.
Mold growth can be hazardous to health and unsightly in appearance, so regular maintenance is essential. Thankfully, cleaning caulk around your toilet is an easy task with the right tools and tips.
Our step-by-step guide will help you select the best cleaning supplies and tackle stubborn stains without breaking a sweat. Remember to take precautions such as wearing gloves and using caution with harsh chemicals.
Removing old caulk and applying new caulk requires patience and attention to detail, but it is crucial in preventing water damage and maintaining a fresh look. Don’t forget about the finishing touches.
Think of yourself as a bathroom warrior equipped with a trusty sponge, bucket of cleaning solution, scraper or putty knife, high-quality silicone caulk, and a caulking gun.