Are you tired of the constant drip-drip-drip of your leaking tub spout? Not only is it an annoyance, but it can also lead to a significant increase in your water bills. Fear not, as fixing a leaking tub spout is a common household issue that can be easily resolved with a little bit of know-how.
If you’re wondering how to fix a leaking tub spout in your bathroom, look no further. In this informative blog post, we’ll take you through a step-by-step guide to bring an end to your leaking concerns.
Firstly, we’ll delve into the reasons behind your tub spout leak so that you have a better understanding of the problem. Then, we’ll move onto the tools needed to fix it and the safety precautions you’ll need to take.
Next up, we’ll guide you through the process of disassembling the tub spout and repairing the issue. Whether it’s fixing the O-ring or replacing the entire spout, we’ve got you covered with a range of options that give you the freedom to choose what works best for your specific problem.
With our help, you’ll have a fully functional tub spout in no time at all. Say goodbye to that irritating dripping sound and hello to lower water bills. So let’s get started and put an end to this pesky problem once and for all.
Contents
Identifying the Source of the Leak
Identifying the source of the leak is simpler than you may think. In this article, we’ll provide you with some helpful tips on how to identify and fix the source of a leaking tub spout.
First and foremost, make sure to turn off the water supply to your bathtub before beginning any repairs. This step will ensure that you can safely work on your tub spout without causing any further damage.
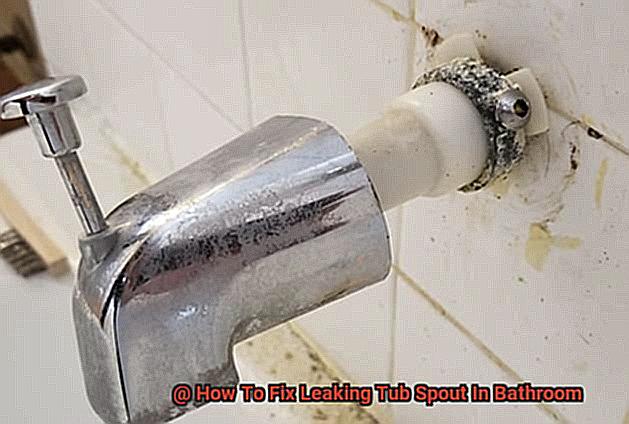
To start, inspect the spout and its components for any signs of damage or wear. Any cracks, chips, corrosion, or rust on pipes or valves could be contributing to the problem and may be the source of the leak.
Next, check for loose connections or fittings around the spout. Loose connections can cause leaks over time, so make sure all connections are properly tightened and free from any visible cracks or leaks.
In some cases, a worn-out washer may be the culprit behind your leaking tub spout. To replace this component, remove the decorative cap on the spout and unscrew the screw that holds the handle using pliers. Once you’ve removed the handle, use an adjustable wrench to unscrew the packing nut and take out the stem. At the bottom of the stem, you’ll see the washer; replace it with a new one, reassemble the faucet in reverse order, and turn on the water supply to check for leaks.
If a corroded valve seat is causing your tub spout to leak, remove the spout from the wall using a pipe wrench or pliers. Next, use a flathead screwdriver to pry out the old valve seat and replace it with a new one. Reinstall the spout and turn on the water supply to check for leaks.
Lastly, if your tub spout has a faulty diverter valve, remove it from inside using pliers or an adjustable wrench. Replace it with a new diverter valve and reassemble the faucet in reverse order. Turn on the water supply to check for leaks.
In conclusion, identifying the source of a leaking tub spout doesn’t have to be a daunting task. By following these easy steps, you can quickly identify and fix the issue at hand.
Fixing a Leaking Tub Spout Caused by a Worn-Out Washer
With some basic tools and plumbing knowledge, you can fix this common problem in no time.
Before getting started, turn off the water supply to your tub. This step is crucial to avoid any accidental water flow while working on the plumbing. You can either shut off the main water valve to your home or the water supply valve to your tub.
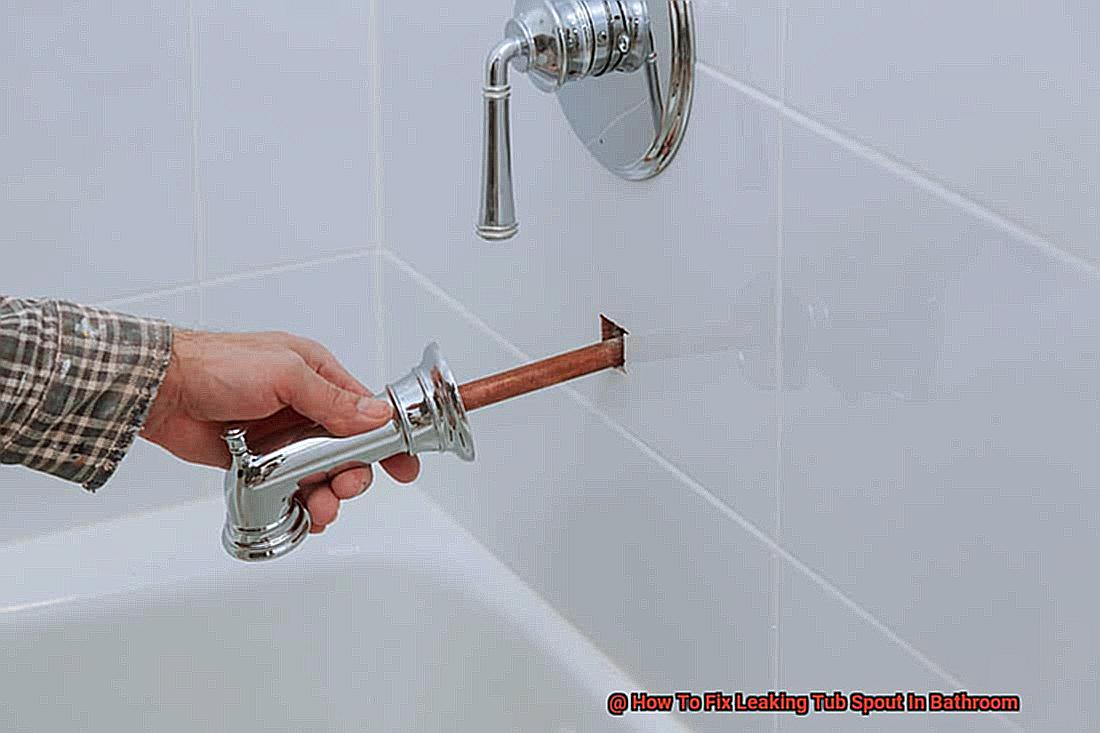
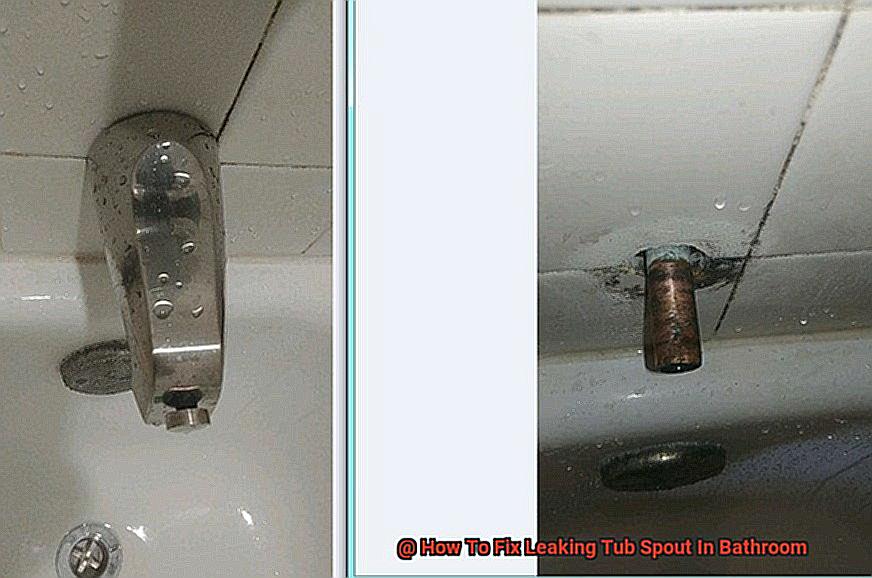
Once the water supply is off, it’s time to tackle the tub spout. Typically, you can unscrew it from the pipe, but be prepared to use pliers or a wrench if it’s tight. Once removed, locate the washer at the end of the spout where it connects to the pipe. Over time, constant use can wear out or damage this small but essential piece that creates a seal between the spout and pipe.
Replace the old washer with a new one of the same size and shape. You can find replacement washers at any hardware or plumbing supply store. Tighten the spout back onto the pipe securely.
Finally, turn the water supply back on and test the tub spout for leaks. If there are no leaks, congratulations. You’ve fixed your leaky tub spout caused by a worn-out washer all by yourself.
However, if there are still leaks, repeat the process or seek professional help.
Repairing a Corroded Valve Seat
A corroded valve seat could be the culprit, but with some basic plumbing knowledge and tools, you can repair it yourself and say goodbye to those pesky leaks.
To start, turn off the water supply to the tub. Next, remove the faucet handle and unscrew the packing nut using a wrench or pliers. This will give you access to the valve stem.
Take a moment to inspect the valve stem for any signs of damage or wear. If all looks good, use a valve seat wrench to remove the old, corroded seat. Remember to take note of the size and shape of the old seat so that you can purchase a replacement.
Now comes the fun part – cleaning. Use a cloth or small brush to remove any remaining corrosion or debris from the area. Once everything is nice and clean, install the new seat using the valve seat wrench.
Reassemble the faucet handle and packing nut, turn on the water supply, and watch your tub spout become leak-free once again.
Replacing a Faulty Diverter Valve
You might be dealing with a faulty diverter valve – the villain responsible for controlling the flow of water between your bathtub and showerhead. But fear not, replacing a faulty diverter valve is a common solution that can be done easily with the right tools and knowledge.
Before you begin, be sure to turn off the main water supply to your home to avoid any potential accidents. Then, remove the handle of the faucet and unscrew the retaining nut that holds the cartridge in place. Once you have removed the cartridge, you can access the faulty diverter valve.
To ensure a successful installation, it’s important to check that the new diverter valve is compatible with your faucet model before proceeding. Apply plumber’s tape to the threads of the new valve before screwing it in place. Then, reassemble the faucet and turn on the water supply to check for leaks.
If you’re not confident in your DIY skills or don’t have time to tackle this project on your own, it’s best to seek help from a licensed plumber.
They can ensure that your new diverter valve is installed properly, preventing any further damage or leaks.
Reassembling the Faucet
Now, it’s time to reassemble the faucet and get everything back to working order. Reassembling the faucet is a straightforward process that requires attention to detail and patience.
Before starting, ensure all parts are clean and free from any debris or corrosion. This will help prevent any future leaks. Start by inserting the stem back into the faucet body and securing it with the retaining nut. Be cautious not to over-tighten the nut, as this can damage the stem.
Next, replace the faucet handle and tighten the screw or set screw that holds it in place. It’s essential to align the handle correctly so that it operates smoothly. If you had to replace any washers or O-rings, make sure you install them back onto the stem before reassembling the rest of the faucet.
The moment of truth has arrived – turn on the water supply valves and let the water run for a few minutes to flush out any debris that may have accumulated during the repair process. It’s vital to check for leaks around the spout and handle to ensure everything is working correctly.
By taking your time and following these steps carefully, you can successfully fix a leaking tub spout in your bathroom without having to call a professional plumber.
Testing for Leaks
But, before you get too excited, there’s one more critical step that you need to take – testing for leaks. Testing for leaks is a vital part of the repair process that ensures you won’t have to worry about any future water damage issues.
To test for leaks, turn on the water supply and let the water run through the tub spout. Be diligent in your examination and check all angles and areas around the spout to ensure there are no hidden leaks. Don’t forget to check under the sink and inspect the walls for any signs of water damage.
If you notice any water dripping or seeping from the spout, it’s crucial to tighten it further or apply sealant to fix the leak. But, be cautious not to overdo it as over-tightening can cause damage to the fixture. If the leak persists, there may be other underlying issues causing it, such as a damaged pipe, which may require professional assistance.
After making any necessary adjustments or repairs, it’s critical to test the spout again for leaks. Repeat this process until you’re confident that there are no leaks present.
Remember, testing for leaks is an essential step in fixing a leaking tub spout. By being thorough in your examination and making any necessary adjustments or repairs, you can ensure that your tub spout is functioning correctly and avoid future water damage issues.
WHd_pKo0gx8″ >
Conclusion
In conclusion, don’t let a leaking tub spout ruin your day. With our step-by-step guide, fixing the issue is easier than you might think. By identifying the source of the leak and utilizing basic plumbing knowledge and tools, you can put an end to that pesky drip.
Remember to turn off the water supply before starting any repairs and take safety precautions when working with plumbing tools. And once you’ve completed the repair process, be sure to test for leaks to avoid future water damage issues.
By fixing your tub spout, you’ll not only eliminate an annoyance but also save money on your water bills. Say goodbye to that constant drip-drip-drip and hello to a more peaceful bathroom experience.