Imagine this: you’re ready to start your day or unwind after a long one with a refreshing shower. You turn on the faucet, and…nothing. No water. Zilch. Nada. Panic sets in as you wonder what could have gone wrong. Don’t worry; you’re not alone in this frustrating situation.
In this article, we’ll guide you through the steps to fix your shower when water isn’t coming out. Whether it’s due to clogged pipes, a faulty valve, low water pressure, or a broken pump, we’ve got you covered with everything you need to know.
We’ll also provide some helpful tips for troubleshooting the issue and narrowing down the root cause of the problem. And don’t worry if you’re not an experienced DIY-er; we’ll give you easy-to-follow instructions on how to fix the problem yourself, whether it’s installing a new faucet or replacing a broken valve.
Contents
How To Fix Shower When Water Isn’t Coming
Check the Water Supply
Picture this: it’s a busy morning, you’re running late for work, and you jump into the shower only to find out that there’s no water coming out. Panic sets in, but don’t worry. Before calling a professional plumber, let’s start by checking the water supply.
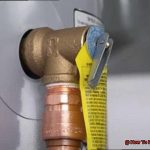
The first step is to make sure that the main water valve is open. It may seem obvious, but sometimes interruptions or turn-offs can occur, causing a temporary loss of water in your shower. If the valve is closed, simply turn it on and wait for a few minutes to see if water starts flowing back into your shower.
If the main water valve is open and you still don’t have any water in your shower, it’s possible that there is an issue with the water pressure in your home. Check all of the other faucets in your home to see if they are also experiencing low water pressure. If they are, you may need to contact your local water company to see if there is an issue with the public water supply.
However, if only your shower is experiencing low water pressure, it’s time to investigate further. The culprit could be a clogged showerhead. Mineral buildup or other debris can restrict the flow of water through the showerhead, causing low pressure or no water at all.
To fix this issue, remove the showerhead and soak it in a solution of equal parts vinegar and water for a few hours. Once it’s done soaking, rinse it thoroughly and reattach it to the shower arm. Voila. This should clear any clogs and restore proper water flow to your shower.
Alternatively, if you have a single-handle shower faucet, there could be an issue with the valve cartridge. Over time, these cartridges can become worn or damaged, which can cause low water pressure or no water at all.
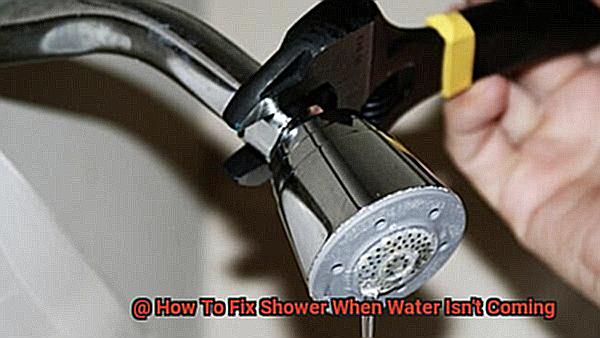
To fix this issue, turn off the main water valve and remove the handle and escutcheon plate from the faucet. Then, use a pair of pliers to remove the valve cartridge and replace it with a new one. Reassemble the faucet and turn on the main valve to test if this has fixed the issue.
Checking for simple issues like clogged showerheads or damaged valve cartridges can often solve the problem of no water coming from your showerhead. Remember to stay calm and always check for simple solutions before calling in the experts.
Clean the Showerhead
If so, the culprit could be a clogged showerhead. Over time, mineral deposits from hard water can build up and block the holes in your showerhead, leading to a decrease in water flow. But don’t let this problem ruin your shower experience. Cleaning your showerhead is an easy fix that you can do yourself with just a few household items.
To get started, follow these simple steps:
Remove the showerhead: This step is crucial to ensure that you can clean every nook and cranny of your showerhead. You can typically remove it by hand or use pliers if it’s stuck.
- Soak in vinegar and water: In a bowl or plastic bag, mix equal parts white vinegar and water, then soak the showerhead for at least 30 minutes. The vinegar will dissolve mineral deposits and unclog any blocked holes.
- Scrub away buildup: After soaking, use an old toothbrush or small brush to scrub the surface of the showerhead and remove any remaining buildup.
- Rinse thoroughly: Once you’ve scrubbed away all the grime, rinse the showerhead thoroughly with water to remove any remaining vinegar solution.
- Check the rubber washer: Before reattaching the showerhead, inspect the rubber washer inside the connection for any damage or wear. Replace it with a new one if necessary to prevent leaks.
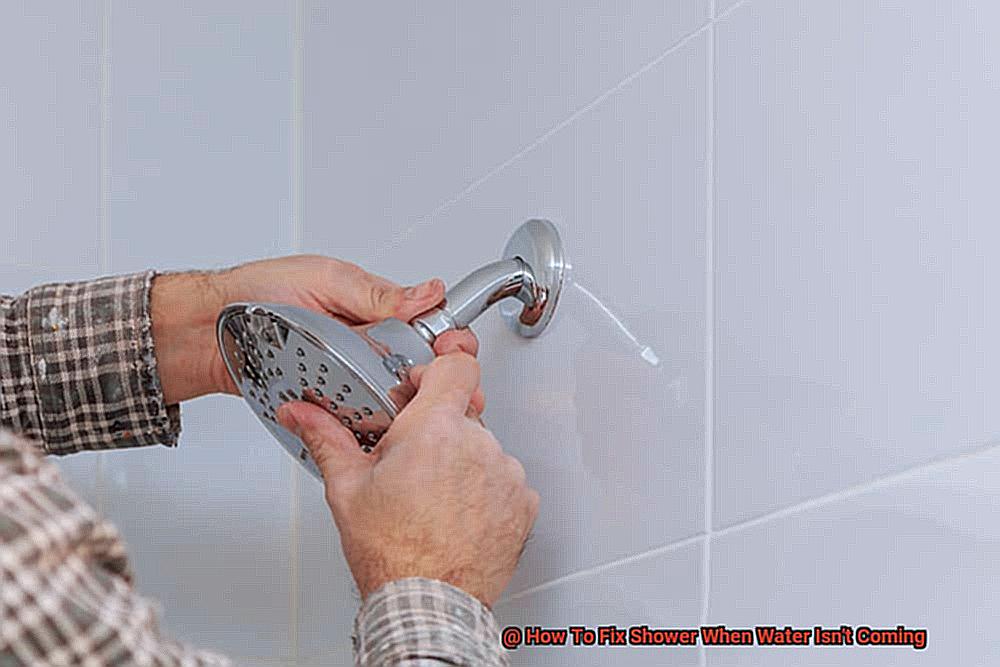
- Reattach and test: Finally, reattach the showerhead to the shower arm and turn on the water to check for proper flow.
Regularly cleaning your showerhead can help prevent future clogs and ensure optimal water flow. We recommend cleaning it every few months or more frequently if you have hard water.
Check the Showerhead Filter
The culprit might be a clogged showerhead filter. Over time, mineral deposits and debris can build up in the filter and restrict water flow, leading to an unsatisfactory shower experience. But don’t worry. Checking and cleaning the showerhead filter is a simple fix that anyone can do.
To begin, locate your showerhead and remove it from the wall or pipe. Most showerheads will simply unscrew by hand, but if it’s particularly tight, you may need pliers or a wrench. Once you’ve removed the showerhead, look inside the connection point that leads to the pipe for a small metal or plastic piece – this is your showerhead filter.
Inspect the filter for any visible signs of debris or blockage. If it looks dirty or clogged, grab a brush or toothbrush and gently scrub away any buildup. If necessary, you can also soak the filter in vinegar or another cleaning solution to help dissolve mineral deposits.
After cleaning the filter, reattach the showerhead to the pipe and turn on the water to see if the flow has improved. Voila. You’ve successfully unclogged your showerhead filter and restored your shower’s water pressure.
Regularly checking and cleaning your showerhead filter is crucial to prevent clogs and ensure a steady water flow in your shower. It’s a quick and easy DIY fix that can save you from calling in a plumber or repair person.
Replace the Shower Valve
Don’t worry, replacing the shower valve might be all it takes to restore your shower’s power. The shower valve controls the flow of water, and if it’s faulty, it can prevent water from coming out of the showerhead. But don’t feel overwhelmed – with just a few simple steps, you can replace the shower valve and get back to enjoying a refreshing shower.
Before beginning, make sure to turn off the water supply to the shower. The valve is located behind the handle, so removing it is the first step. This can be done by prying off the decorative cap and removing the screw underneath.
Once the handle is removed, take off the trim plate to expose the valve. The next step is to remove the cartridge, which controls the flow of water. Use a pair of pliers to remove any retaining clips or screws holding it in place.
With the cartridge removed, it’s time to install a new one that matches your current one. Make sure it’s installed correctly and reassemble the valve. Turn on the water supply and test it out by turning on the shower.
If replacing the shower valve doesn’t solve the issue, there may be a blockage in the pipes or a larger plumbing problem. In this case, it’s best to consult a professional plumber who can help you proceed with fixing your shower.
Professional Plumbing Services
Dealing with a faulty shower can be a frustrating experience, especially when you don’t have the necessary skills and knowledge to fix it yourself. This is where professional plumbing services come in – they have the expertise and experience to diagnose and repair complex plumbing issues that DIY methods may not be able to solve.
Before calling for professional plumbing services, it’s important to do your research and find a reputable company. Look for licensed, insured, and experienced plumbers who specialize in dealing with shower-related issues. Check their reviews and references from satisfied customers to ensure that you’re getting the best service possible. Additionally, make sure to inquire about pricing and any guarantees or warranties offered by the company.
Once a professional plumber arrives at your home, they will inspect the shower and its components thoroughly.
This may involve checking the water supply lines, valves, faucets, and showerhead. Using specialized tools, they will clear any clogs or blockages in the pipes or drain and replace damaged or worn parts such as a faulty valve or corroded pipe. In some cases, they may need to install new plumbing fixtures or even replace the entire shower system.
Although professional plumbing services may require a higher cost than DIY methods, it’s important to remember that they provide a level of expertise and assurance that can save you time and money in the long run. By relying on experts in the field, you can rest assured that your shower issue will be resolved quickly and efficiently.
qnLMwkbU1V0″ >
Conclusion
In conclusion, a non-functioning shower can be a frustrating experience, but don’t despair. There are several ways to fix the problem and get your shower back up and running. Don’t overlook simple issues like clogged showerheads or damaged valve cartridges – these are often the culprits behind a lack of water flow. Regularly cleaning your showerhead and checking the filter is also crucial to prevent clogs and ensure consistent water pressure.
If you’ve tried DIY methods without success, it’s time to call in the professionals. Plumbing services have the expertise and experience to diagnose and repair complex plumbing issues that DIY methods may not be able to solve. However, before hiring someone, make sure you do your research and find a reputable company you can trust.
Remember, dealing with a faulty shower can be overwhelming, but taking a deep breath and following these steps can save you time and money in the long run.