Have you ever noticed water seeping around your shower door?
It’s time to learn how to caulk shower doors with weep holes. Weep holes are essential for any shower door installation – they prevent water from entering the wall and causing damage.
To ensure a tight seal and keep out moisture, caulking around the door is a must. In this blog post, we’ll show you how to caulk shower doors with weep holes.
We’ll explain why it’s important, what equipment you need, and the steps involved. Plus, our tips will help make sure your job is done right and guide you through troubleshooting any issues that arise.
Knowing how to caulk shower doors with weep holes is essential if you want to protect your bathroom from water damage. It’s easy – just follow a few simple steps and use the right products.
Let’s get started.
Contents
- 1 Preparing the Shower Door Track for Caulking
- 2 Applying Caulk to the Shower Door Track
- 3 Smoothing Out the Caulk
- 4 Allowing the Caulk to Dry Completely
- 5 Regularly Cleaning the Weep Holes
- 6 Tips for Cleaning Weep Holes
- 7 Benefits of Properly Caulking Your Shower Door
- 8 Common Mistakes to Avoid When Caulking Your Shower Door
- 9 Conclusion
Preparing the Shower Door Track for Caulking
Caulking the shower door track is an easy and inexpensive way to revamp your bathroom.
But before you get started, there are some important steps you need to take in order to ensure a watertight seal. Start by cleaning the track of any dirt, dust, or debris.
Use a vacuum cleaner or soft-bristled brush for larger particles and then use a damp cloth or sponge with a mild detergent solution or all-purpose cleaner for a thorough clean. Make sure to dry off the track completely before proceeding with the caulking process; use a dry cloth or rag to remove any moisture or water spots.
After sweeping the track, inspect it for any visible signs of damage such as cracks, chips, or dents. If there is any harm present, repair it before starting with the caulking process so that the seal will be strong and watertight.
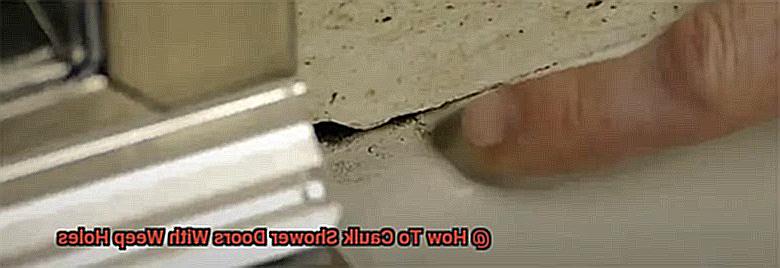
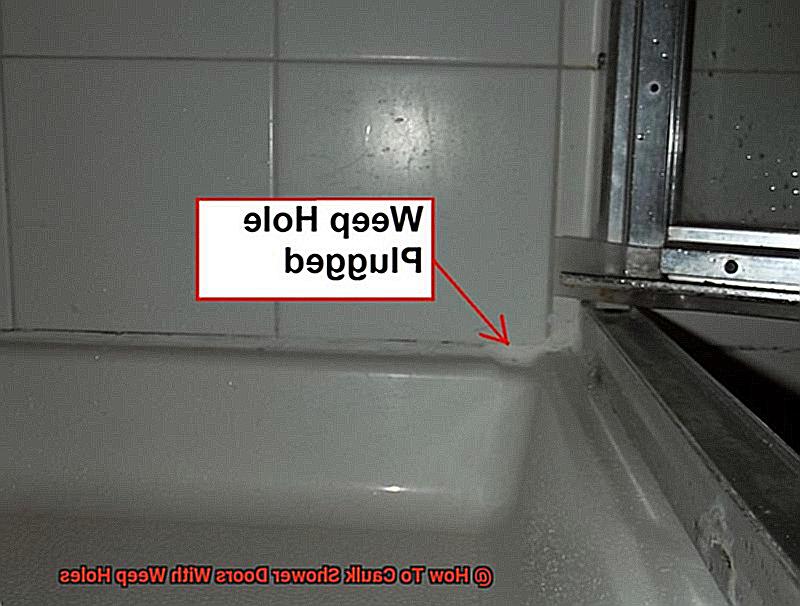
Once you have prepped the shower door track, apply silicone-based caulk around it and fill in any gaps or crevices. Don’t forget not to cover up any weep holes as they are designed to encourage water out of the track and discourage mold formation.
Smooth out the caulk with a wet paper towel or your finger and let it sit for at least 24 hours before using the shower again.
Applying Caulk to the Shower Door Track
Caulking a shower door track with weep holes is an essential part of shower maintenance and can help prevent costly water damage.
To ensure the best results, it’s important to choose the right type of caulk for the job and apply it correctly. Silicone-based caulk specifically designed for use in wet areas such as showers and tubs is ideal for this task.
Start by thoroughly cleaning the shower door track to ensure it’s free of any debris or residue. Use a scrub brush and a mixture of warm water and mild detergent to clean the area, rinsing thoroughly before allowing it to dry completely.
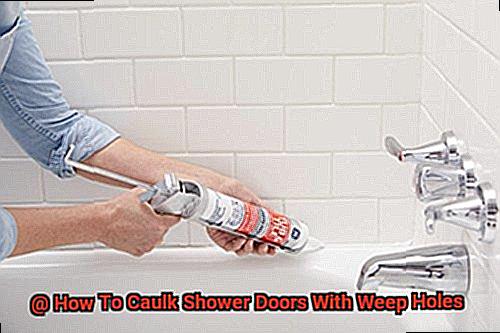
Once the track is clean, apply a thin, even bead of caulk along the inside edge using a caulk gun for precise application. Smooth out the caulk with your finger or a caulking tool in a steady motion along the length of the track.
Be sure not to cover up any weep holes located in the bottom of the track as they are designed to allow water to drain out and prevent moisture buildup. If necessary, use a toothpick or other small tool to remove any excess caulk that may be covering them.
Allow 24-48 hours for the caulk to dry completely before using your shower again.
Smoothing Out the Caulk
Achieving a smooth, even finish when caulking shower doors with weep holes is essential for creating a professional look and preventing water damage.
To get the job done right, you’ll need a caulk finishing tool or even a plastic spoon. Start at one end of the track and work your way to the other, using your tool or finger to create an even surface.
If you find any gaps or areas where the caulk didn’t adhere properly, use a toothpick or other small tool to fill them in with more caulk. Once you’re satisfied with the results, let it dry completely before using the shower.
Smoothing out your shower door’s caulk may seem like a tedious task, but it’s essential for keeping your bathroom clean and functional for years to come.
Allowing the Caulk to Dry Completely
When it comes to perfecting your shower door, patience is key.
Though it’s tempting to jump in the shower and test out your handiwork straight away, it’s essential that you allow the caulk to dry completely before using the shower. The drying time can differ depending on the type of caulk used, humidity levels, and temperature.
Be sure to consult the manufacturer’s instructions for more information. During this period, keep the shower doors open and avoid getting the caulk wet until it’s totally dry.
This will help guarantee that your caulk dries evenly and does not crack or peel over time. Once your caulk has dried, you can assess for any spots that may need touching up.
Regularly Cleaning the Weep Holes
Keeping your shower door in top condition requires regular cleaning of the weep holes.
Weep holes are designed to allow water to drain out of the shower door track and prevent standing water from leading to mold and mildew growth. Over time, however, debris like hair, soap scum, and mineral deposits can accumulate and clog the weep holes.
To clean the weep holes effectively, use a soft-bristled brush or toothbrush to remove any visible debris. For tougher build-up, a mixture of vinegar and water can be used to break down mineral deposits and soap scum.
It’s important to avoid using harsh chemicals or abrasive materials that could damage the weep holes or the finish of the shower door. Experts recommend cleaning the weep holes at least once a month in order to prevent clogs and ensure proper drainage.
If you have hard water or use your shower frequently, more frequent cleaning may be necessary. Regular cleaning will also help identify any potential issues with the weep holes or the shower door track.
In addition to regular cleaning, it’s essential to inspect the weep holes and shower door track for any signs of damage or wear. If left unchecked, these areas may become cracked or damaged over time which can lead to leaks and water damage – not something you want.
Tips for Cleaning Weep Holes
Weep holes are essential for preventing water damage in shower door frames and tracks, but they can easily become clogged with debris such as dirt, soap scum, and hair. This can lead to stagnant water build-up, mold growth, and corrosion. To keep your weep holes clean and operating properly, here are some tips:
Use a toothbrush or small brush
Gently scrub the weep holes with a toothbrush or small brush to remove any buildup of dirt or grime.
Use a cleaning solution
Apply a cleaning solution such as vinegar and water or a mild soap to loosen any dirt or grime that may be present. Let it sit for a few minutes before scrubbing with a brush.
Use compressed air
A can of compressed air can be used to blow out any debris or dirt that may be stuck in the weep holes. Be sure to use the can at a safe distance to avoid any injury to your eyes or skin.
Check weep holes after cleaning
After cleaning, check the weep holes to make sure water is draining properly. If you notice any slow drainage or pooling of water, repeat the cleaning process until all debris is removed from the weep holes.
Benefits of Properly Caulking Your Shower Door
Caulking your shower door is an often-overlooked task, but it’s one that offers numerous benefits.
From preventing water damage and mold growth to enhancing the aesthetic appeal of your bathroom, properly caulking your shower door is a simple step that can provide significant long-term benefits. To start, caulking your shower door helps keep water from seeping through gaps and cracks in the frame, which can lead to mold and mildew buildup.
Not only are these conditions unsightly, but they can also cause health problems such as allergies and respiratory issues. In addition, caulking your shower door helps maintain the integrity of your bathroom structure by preventing water from seeping through and causing damage.
It also adds value to your home by making the space look cleaner and more polished. Overall, properly caulking your shower door is an easy and inexpensive solution that offers numerous benefits.
With just a few simple steps, you can protect your home from water damage, mold, and mildew while also improving its appearance.
Common Mistakes to Avoid When Caulking Your Shower Door
Caulking your shower door with weep holes is a great way to keep your bathroom looking fresh and ensure that your seal remains intact.
However, there are some common mistakes you should avoid in order to ensure a successful caulk job. First, it’s essential to properly clean the surface before applying caulk.
Any dirt, dust, or debris that gets trapped underneath the caulk can cause it to crack or peel over time. Additionally, be sure to select a caulk specifically designed for wet areas and compatible with the material of your shower door to ensure a durable seal.
It’s also important not to overapply caulk as this will create an unsightly seal that may be prone to cracking or peeling. For best results, use a thin and even layer of caulk.
By avoiding these common mistakes and following proper application techniques, you can get the long-lasting seal you desire for your shower door with weep holes.
-jK1TQQkrpU” >
Conclusion
Caulking your shower doors with weep holes is an essential way to protect your bathroom from water damage.
With just a few simple steps, you can keep your shower sparkling and ensure that the seal remains tight for years to come. Begin by sanitizing the shower door track and then evenly applying a thin layer of silicone-based caulk.
Be sure not to cover any weep holes as they are designed to allow water to drain out and discourage mold growth. Smooth the caulk with a wet paper towel or your finger, and let it dry for at least 24 hours before using the shower again.
Additionally, regular cleaning of the weep holes is critical in order to prevent clogs and ensure proper drainage. Use a soft-bristled brush or toothbrush to remove any visible debris, and apply mild soap or vinegar if needed.