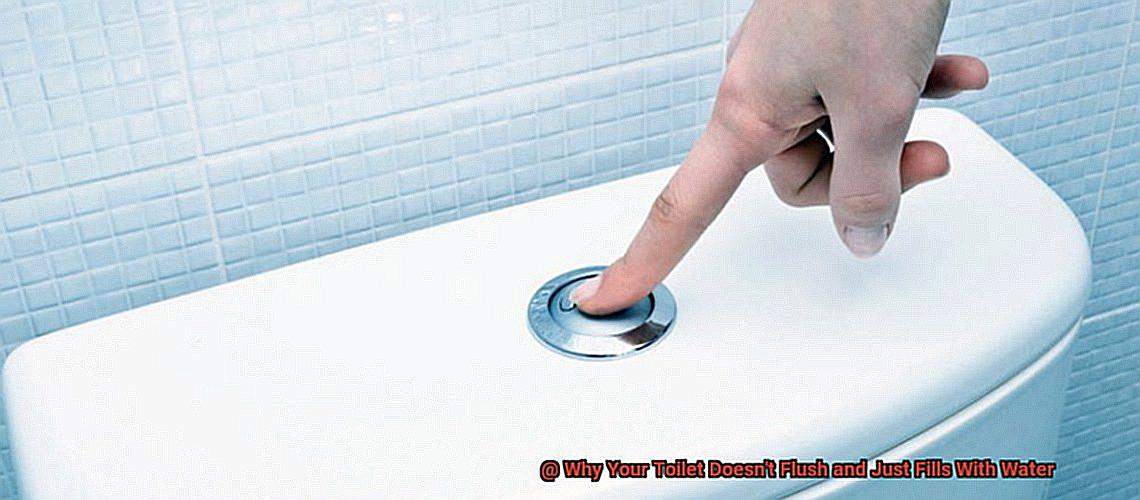
Have you ever had a toilet mishap where the water just keeps rising and refuses to go down?
It’s frustrating, especially when you’re in the middle of using it. But don’t worry, you’re not alone in this predicament.
So, what causes this problem? There are several reasons why your toilet doesn’t flush and fills with water.
A clogged sewer line, malfunctioning flapper, low water levels in the tank, or blocked vent pipe are all typical culprits. These issues can obstruct your toilet’s suction ability or leave you with an unpleasant mess.
But fear not. We’ve got all the tips and tricks you need to get your toilet back to normal.
Whether it’s a simple blockage or a more complicated issue, we’ve got you covered. We’ll explore the most common causes of the problem, potential solutions, and some things to keep in mind when cleaning your toilet.
So, let’s start now.
Contents
Causes of Toilet Not Flushing Properly
Dealing with a toilet that won’t flush properly can be downright frustrating.
Not only is it inconvenient, but it can also be embarrassing, especially when you have guests over. But worry not, as there are several common causes of this issue that you can quickly identify and solve.
One of the most frequent reasons for a toilet not flushing correctly is a clogged drain. Similar to a traffic jam on a highway, flushing items like feminine hygiene products, wipes, or too much toilet paper down the drain can cause a buildup that results in reduced water flow and poor flushing performance.
A plunger may be able to remove minor clogs, but if the clog is severe, it’s best to call a professional plumber who can use specialized tools like a plumber’s snake to remove the obstruction. Another potential culprit is a faulty flapper valve.
This valve acts as a gatekeeper, regulating the flow of water from the tank into the bowl during flushing. If the flapper valve is damaged or worn out, it may not seal correctly, leading to reduced water flow and poor flushing performance.
A faulty float system could also be to blame for your toilet not flushing properly. This device controls the amount of water that flows into the tank after a flush.
If it’s not functioning correctly, it could release too much water into the tank, preventing proper flushing. Additionally, low water levels in the tank can cause your toilet to fail to flush properly.
This problem can arise if the water supply to your toilet is partially or fully shut off or if there is a leak in the tank or bowl.
By knowing these potential causes and taking steps to prevent them from happening again, you can ensure that your toilet works efficiently and avoid any unnecessary headaches.
Clogged Drain
To begin with, let’s take a look at what causes a clogged drain. Flushing items such as toilet paper, feminine hygiene products, or even toys down the toilet can lead to blockages in the drain pipe, causing water to back up into the toilet bowl.
So, it’s essential to use caution when flushing anything other than toilet paper and bodily waste down the toilet. Now, before calling in a professional plumber, there are basic DIY techniques that you can try.
The most popular method involves using a plunger to dislodge the blockage. By placing the plunger over the drain hole in the toilet bowl and pushing down firmly, suction is created.
Then, pull up quickly to create pressure that will hopefully force the blockage through. Another alternative is to use a plumbing snake or auger to physically remove the blockage from the drain pipe.
This technique involves inserting the snake into the toilet bowl and pushing it down until it reaches the blockage. Once located, turn the handle on the auger to break up or remove the blockage.
However, if these DIY methods are unsuccessful or if you’re unsure about doing them yourself, it’s time to call in a licensed plumber. They have specialized equipment that can help identify and remove even the most stubborn of blockages.
It’s important to remember that ignoring a clogged drain can lead to more severe issues such as overflowing toilets and water damage.
So don’t wait until it’s too late; take prompt action to solve the issue and ensure that your toilet is functioning properly once again.
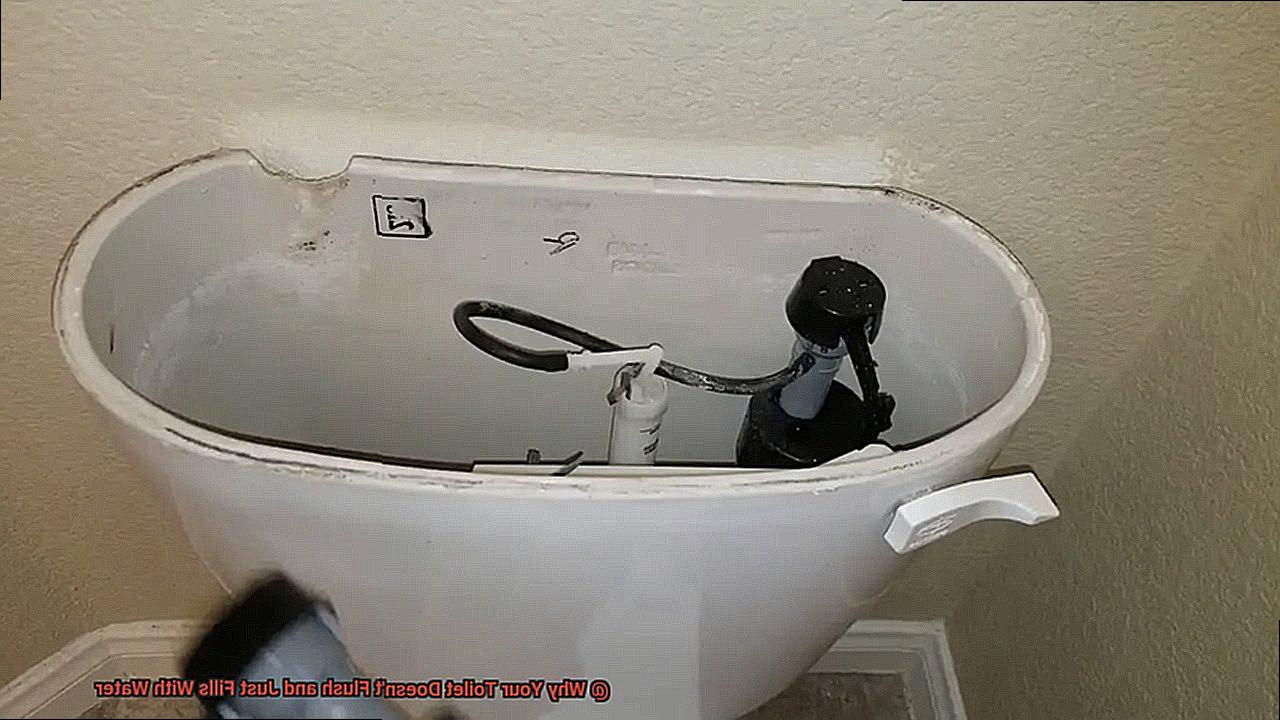
Faulty Flapper Valve
This frustrating experience is often caused by a faulty flapper valve.
The flapper valve may seem insignificant, but it plays a pivotal role in the flushing process. When you flush your toilet, the flapper valve releases water from the tank into the bowl.
But if it’s not working correctly, you may encounter several issues. A common problem associated with a defective flapper valve is a constantly running toilet.
Over time, the valve can become damaged or worn, causing it to no longer seal correctly. This allows water to escape from the tank and fill up the bowl continuously.
In addition, a faulty flapper valve may not lift high enough when you flush, which means there won’t be enough water in the bowl to flush waste down the drain. This can result in clogs and backups that can damage your plumbing system.
Thankfully, fixing a faulty flapper valve is usually an easy and inexpensive repair. You can simply replace it with a new one that fits your toilet model.
However, it’s essential to choose the right size and type of flapper valve for your specific toilet.
So, don’t put up with a running toilet or incomplete flushes caused by a defective flapper valve.
Malfunctioning Float System
When this system malfunctions, it can cause chaos in your bathroom. So, what exactly is the float system?
It comprises three essential components: the fill valve, float arm, and ballcock assembly. The fill valve refills the tank with water after each flush, while the float arm and ballcock assembly work together to regulate the water level in the tank.
If any of these parts are damaged or worn out, it can cause the entire system to fail. Now let’s dive into how to tackle this pesky problem.
First things first: turn off the water supply to your toilet and flush it to remove any remaining water in the tank. Next, try adjusting the float arm by bending it slightly upward to increase the water level or downward to decrease it.
If this doesn’t work, you may need to replace the ballcock assembly entirely. Think of it like tuning an instrument; even small adjustments can make a significant difference in the end result.
By maintaining your float system and making sure it’s functioning correctly, you can prevent future clogs and backups while also conserving water.
So, a malfunctioning float system is a common reason why your toilet won’t flush and only fills with water.
Low Water Pressure
A bad flush can make you feel like you’re constantly fighting with your toilet rather than just using it.
But fear not, as the culprit is likely to be one of a few common problems that can be easily addressed with some troubleshooting and potentially professional assistance. One of the most common causes of low water pressure is a blocked pipe or sewer line.
This can happen due to anything from tree roots to flushing non-flushable items down the toilet. If you suspect this is the source of the blockage, it is best to call in a licensed plumber who can quickly crack the blockage and get things back to normal.
Another issue that can contribute to low water pressure is a malfunctioning fill valve. This vital component regulates the amount of water that flows into the tank after each flush.
If it’s not functioning correctly, it could result in low water pressure and an incomplete flush. In these situations, replacing the fill valve may be necessary to resolve the issue.
It’s also important to check the water supply valve leading to the toilet when experiencing low water pressure. The valve may not be fully open, or there may be a blockage in the line leading to the toilet.
Ensuring that the valve is fully open and that there are no blockages can both help increase water pressure and improve your toilet’s flushing ability.
So, low water pressure can be a frustrating issue when it comes to your toilet’s flushing system.
Prevention Tips for Avoiding Toilet Problems
Toilet problems are never fun to deal with and can be quite a hassle. But, the good news is that there are plenty of simple steps you can take to prevent them from happening in the first place. In this blog post, we will discuss five prevention tips for avoiding toilet problems.
Proper use of the toilet
It’s important to remember that your toilet is designed to handle only human waste and toilet paper. Flushing anything else down the toilet, such as feminine hygiene products, wipes, or paper towels, can clog your pipes and cause your toilet to fill with water instead of flushing properly.
Regular cleaning
Keeping your toilet clean is crucial in preventing toilet issues. Not only will it keep your bathroom looking fresh, but it can also prevent the buildup of minerals and debris that can cause clogs or damage to your toilet’s components. Use a mild cleaner and a soft brush to clean the inside of your toilet bowl and tank.
Water pressure
High water pressure can cause a range of issues, including overflowing toilets. Be sure to check your water pressure regularly and install a pressure regulator if necessary to keep it at a safe level.
Regular maintenance
Regular maintenance is essential for preventing toilet problems. Check for leaks around the base of your toilet and under the tank periodically. Replace any worn-out or damaged parts promptly. Consider having a professional plumber inspect your toilet annually to catch any potential issues before they become larger problems.
Proper flushing technique
Teach everyone in your household the proper way to flush the toilet. This means holding down the handle until all waste has been flushed away and the tank has completely refilled. Flushing too quickly or not holding down the handle long enough can lead to clogs and other issues.
By following these simple prevention tips, you can avoid many common toilet problems and ensure that your bathroom runs smoothly. Remember, a little effort now can save you time and money in the long run.
How to Unclog a Toilet Drain
Dealing with a clogged toilet drain can be a frustrating and embarrassing experience. Luckily, there are several methods you can use to unclog your toilet and get it flowing again. Here are some methods you can try:
Plunging Your Way Out of a Clogged Toilet Drain
The plunger is the most basic and common tool used to unclog a toilet drain. When your toilet won’t flush, grab a heavy-duty plunger and place it over the drain hole. Firmly press down and pull up quickly to create suction. Repeat this motion until the clog is dislodged.
Snaking Through a Stubborn Clog
If plunging doesn’t work, it’s time to try using a plumbing snake or auger. This tool is designed to be inserted into the drain and rotated, allowing it to break apart any solid obstructions. However, improper use can cause damage to your plumbing system, so be sure to follow the manufacturer’s instructions carefully.
The Dynamic Duo: Baking Soda and Vinegar
Another eco-friendly method to unclog your toilet drain is by using baking soda and vinegar. The mixture creates a chemical reaction that can help break up blockages and eliminate odors. Pour 1 cup of baking soda into the toilet bowl followed by 1 cup of vinegar. Let the mixture sit for about 30 minutes, then flush with hot water.
When All Else Fails: Call a Professional Plumber
If none of these methods work, it may be necessary to call in a professional plumber. They will have specialized tools and equipment that can effectively remove even the toughest clogs without causing damage to your plumbing system. A plumber’s expertise can also help identify underlying issues that may be causing repeated clogging.
Prevention is Key
Preventing clogs from forming in the first place is always better than having to deal with a clogged toilet drain. Avoid flushing things down the toilet that shouldn’t be flushed, such as feminine hygiene products, wipes, or too much toilet paper. Regular maintenance and cleaning will also help to prevent clogs from forming.
So, unclogging a toilet drain can be done using several methods depending on the severity of the clog.
From using a plunger or plumbing snake to a mixture of baking soda and vinegar, these methods can effectively remove blockages and restore your toilet’s flushing capabilities.
However, prevention is always better than cure when it comes to clogging a toilet.
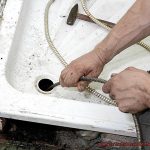
How to Replace a Faulty Flapper Valve
If so, a faulty flapper valve could be to blame. The flapper valve is a rubber or plastic component that sits at the bottom of the tank and controls the flow of water into the toilet bowl. Over time, wear and tear can cause the flapper valve to become misaligned or damaged, preventing it from creating an airtight seal and causing water to continuously flow into the bowl without flushing it.
Replacing a faulty flapper valve is a simple and cost-effective solution to this problem. In this blog post, we will guide you through some steps to replace a faulty flapper valve.
Step 1: Turning Off the Water Supply and Draining the Tank
The first step is to turn off the water supply to your toilet by shutting off the valve on the wall behind it. Once you have turned off the water supply, flush your toilet to empty the tank and remove any remaining water with a sponge or towel.
Step 2: Removing the Old Flapper Valve
Next, disconnect the old flapper valve by disconnecting it from the chain that connects it to the flush handle and lifting it out of the tank. Take note of how it was connected so that you can install the new one correctly.
Step 3: Checking for Proper Fit
Before installing the new flapper valve, check that it fits properly in your toilet tank. Flapper valves come in different sizes and shapes, so make sure you have the right one for your toilet.
Step 4: Installing the New Flapper Valve
Attach the new flapper valve to the chain and position it over the hole at the bottom of the tank, making sure it creates a tight seal. It’s essential to ensure that the new flapper is aligned correctly and sealed tightly to prevent any leaks that can cause water to continuously flow into the bowl, preventing your toilet from flushing properly.
Step 5: Testing Your New Flapper Valve
Finally, turn on the water supply and test your new flapper valve. Flush the toilet a few times to make sure that it is working correctly and creating an airtight seal. If you notice any leaks or issues with your new flapper valve, double-check that it is installed correctly or consider calling a plumber for assistance.
So, a faulty flapper valve can cause many problems with your toilet, but it’s easy to replace with just five steps. Replacing a faulty flapper valve is an inexpensive and straightforward DIY project that can save you money on costly repairs in the long run.
How to Adjust the Float System on Your Toilet
Have you ever wondered how your toilet knows when to stop filling up with water? The answer lies in the float system. It is a crucial part of your toilet’s plumbing as it controls the water level in the tank.
The float typically consists of a small plastic or metal ball attached to a rod that moves up and down as the water level changes. Without it, your toilet may overflow or not flush properly.
Adjusting the float system in your toilet is simpler than you might think. Locate the float device in your toilet tank, usually a plastic or metal ball attached to a metal arm that moves up and down as the water level changes.
You can adjust the float’s height by either bending the metal arm or adjusting the screw on top of the fill valve. After making adjustments, flush your toilet to see if it’s working properly.
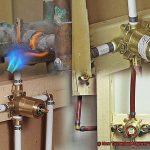
Troubleshooting Low Water Pressure Issues in Your Home Plumbing System
Before you call a plumber, it’s worth trying some troubleshooting steps to fix the issue yourself.
Firstly, check the water pressure at your main water supply valve using a pressure gauge. If it’s below the normal range of 40 to 60 psi, that could be the cause of low water pressure issues.
Next, look for any clogs or obstructions in your pipes and valves. Turn off the main water source valve and open all the faucets in your home.
If any of the faucets have poor water pressure or no water flow, there could be a clog or blockage in the pipes. Leaks are another common cause of low water pressure.
Check for obvious leaks around pipes and valves and listen for hissing or dripping sounds that could indicate a hidden leak. Leaks not only cause low water pressure but can also damage your home.
If you’re unable to identify the source of low water pressure, it’s time to call in a licensed plumber. They can use specialized tools and equipment to diagnose and repair any plumbing issues causing low water pressure in your home.
Bu-ZA1V8B04″ >
Conclusion
If you find yourself in a situation where your toilet doesn’t flush and just fills with water, don’t panic.
There are several reasons why this might happen, from a clogged drain to a malfunctioning flapper valve. By understanding the underlying cause of the problem and taking appropriate action, you can quickly get your toilet back up and running.