Grout is the porous material found in between tiles.
It can be stained, and it can even look dull and ugly. To brighten your grout, you have to choose from several chemical treatments.
Some staining agents, such as baking soda and vinegar, can stain the tile but not affect the grout. So, will grout hide uneven tile?
Uneven tiles can be annoying to look at and can damage the grout.
Luckily, grout can hide uneven tiles. As long as the tiles are level, the grout won’t peek through.
On the other hand, if the tiles are uneven and the grout doesn’t cover them completely, the tile will show through the grout.
Contents
Will Grout Hide Uneven Tile?
If you have a home with tile floors, you may have come across grout lines, which are the spaces between the tiles where dirt can accumulate.
These lines can be unsightly, and you may be looking for tips on how to clean them without damaging your tile floors.
Before you can clean the grout lines on your tile floors, you will need to remove the dirt and grime that has accumulated on them.
The easiest way to remove dirt is by using cleaning solutions.
Choose a cleaning solution that is safe for tile and grout. Use a dry mop to remove dirt from your tile floors. Wipe the tiles clean with a sponge and cleaning solution.
After cleaning the tiles, you’ll need to seal the grout lines with a protective solution.
This prevents dirt from accumulating in the grout lines. Look for a grout sealer that is recommended for tile floors.
Apply the protective solution using a paintbrush. The protective solution should dry in about 10 minutes.
Once the grout has dried, you will need to apply grout dye to color the grout lines on your tile floors. Grout colorants are available in a variety of colors.
Choose a color that matches your tile floors. Apply the colorant using a paintbrush. Allow the colorant to dry for about 30 minutes.
After applying the grout colorant and protective solution, you will need to clean the floor again.
Use the same methods and cleaning solutions used to remove the dirt. Wipe the floors clean with a sponge and cleaning solution.
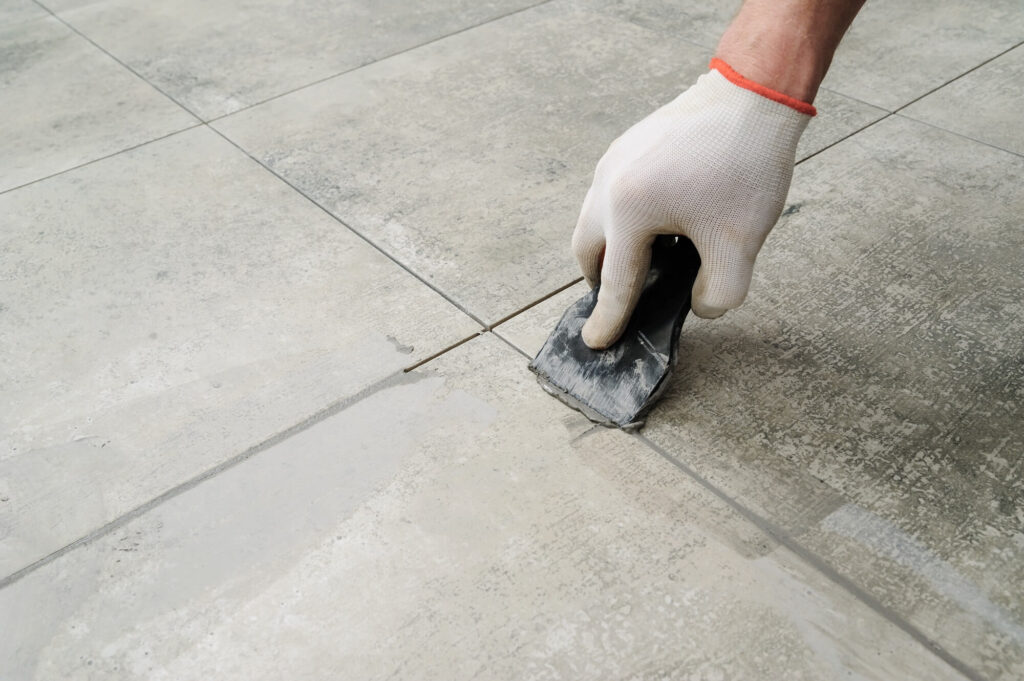
Reconstitution of grout lines may be necessary if the grout lines on your tile floors are cracked or chipped.
Before you replace the grout lines, you will need to remove the old grout from the tile floors.
Use a chisel to remove loose grout from the tile surface. Apply a grout remover to old grout lines. Use a putty knife to scrape the grout from the tiles.
You will need to clean the floor again after removing the old grout. Apply a protective solution and seal the grout lines on the tile floors after cleaning them with cleaning solutions.
Apply grout dye to the grout lines after cleaning the floors. Allow the grout lines to dry in about 30 minutes.
Once the grout has dried, you will need to apply grout sealer to the grout lines on your tile floors using a paintbrush.
After the grout sealer has dried, the floor should be ready for use.
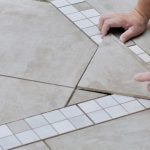
How To Use Grout To Hide Uneven Tile
Using A Damp Cloth, Remove Excess Grout
Even if you take care, some excess glue will still remain on the tile surface after the paste hardens and you have applied it to the tile.
This is a legitimate issue, but it all depends on how you use the excess glue. If you properly use it to hide uneven tiles, there is no need to worry.
At this stage, a damp cloth will be very helpful in removing the excess glue from the tile surface.
Perpendicularly Apply
When you’re satisfied with how the excess glue is covering the uneven spots on the floor, you can start applying it perpendicularly across the tiles to make the design more appealing.
This is especially critical when the pattern is square or rectangular in shape; this will allow you to make the edges appear even and balanced.
The idea here is to ensure that you are moving the glue along a straight line and not allowing it to get loose. This will result in a perfectly polished floor with no imperfections.
If you don’t do this, it will result in an uneven and messy design that will make the whole floor look unprofessional.
Use your finger to distribute the grout evenly over the tiles using the damp cloth; this step should last for about 10-15 minutes, depending on how much paste you have on the floor.
Don’t hurry the procedure, and make sure to use enough paste to cover every imperfection in the floor tiles without looking too messy or unnatural.
Start By Applying Horizontally
The approach you will take when covering any irregularity in the floor tiles will depend on the kind of pattern you are working with.
If you have a circular pattern, for example, then it’s advisable to start by applying the glue horizontally before moving to the vertical direction.
When working with an uneven ceramic tile floor, you should always start by applying the adhesive horizontally, followed by a vertical application to ensure that there are no gaps left unfilled by the paste.
To begin, you will simply need to apply the liquid adhesive along the edges.
This should be done neatly and quickly to prevent stains from forming around the tiles.
The objective of this is to ensure that the entire floor has a uniform and smooth surface, and if left unchecked, the results may end up looking messy or unprofessional.
Select a Complementary Color
You should begin by picking a color that complements the existing design of the floor tiles; this will make the floor look more professional and appealing.
What counts here isn’t so much the color as the application method; avoid using strong colors that can end up distracting from the overall design of the ceramic tiles.
If the color is off, the individual will find it difficult to concentrate while in the office because of the constant distraction caused by the colors and patterns.
This can seriously affect the productivity of employees at the workplace.
This is why you should match the color and application technique to the design and pattern of the existing ceramic tiles on the floor.
When you’ve decided on the correct sort and color of grout to use, you can start applying it over the irregularities and imperfections in the ceramic tiles.
Begin The Final Process
Lastly, you will complete the process by wiping the tiles clean with a damp cloth and removing all stubborn stains that may have been formed around the tiles during the process of coating the adhesive.
Using a damp cloth to wipe the tiles clean should be your last resort, because using water on ceramic tiles may result in permanent damage to the material.
Also Read: How to Fix Uneven Tile Edges
Final Words
Grout may be used to conceal cracks and irregularities in ceramic floor tiles, but the process is not as simple as it sounds.
Find a matching grout color, mix it, and apply it properly over the surface to end up with a professional-looking finish.
When finished, wipe away any leftover glue with a damp rag to avoid causing further damage to the floor.
This ensures that the tile looks neat and professional throughout your office, as no one will be distracted by unsightly lines and cracks in the tile.
The application procedure is critical because it will determine the quality of the job you do; you can mess up the whole room by using the wrong process or failing to wipe up any glue that may have spilled on the floor.
This is how you hide cracks in ceramic tiles with grout.