The corner of the shower stall is often exposed to excess moisture, leading to water leaks.
If the leak isn’t repaired, it will eventually damage the stall and the foundation behind it. There are various methods people can use to fix the leak, such as repairing the tiles or building a seal between the wall and the ceiling.
So, why is the shower stall leaking in corner? When showering, you may have noticed that the water stops flowing at a certain point in your shower stall.
It may seem like there is a blockage in the pipe draining the water out of the shower stall. However, the blockage is more likely in the corner of the shower stall.
This corner is usually blocked by a rubber seal that is either missing or broken. If the seal is broken, water can flow out of this corner.
To avoid this, you should check the rubber seal in the corner of the shower stall periodically. If the seal is broken, you should replace it immediately.
Contents
Why Is The Shower Stall Leaking in Corner?
The shower stall is leaking in a corner of the bathroom. The shower stall is usually made of fiberglass, which is strong and waterproof.
The leak might be caused by water damage or a small crack in the stall. There are simple solutions to fix this problem.
First, try tightening the screws in the seat and the walls.
If this does not fix the leak, then you need to find the source of the leak and repair it.
The leak might be caused by water damage or a small crack in the stall.
Water Damage
If the shower stall is leaking due to water damage, then you might need to replace the shower pan.
Remove all the screws and take out the shower pan.
Then, clean the shower pan with water and detergent. Once the pan is dry, reinstall the pan again.
Small Crack
If the shower stall is leaking due to a small crack, then tighten the screws in the seat and the walls.
If this does not fix the leak, then you need to find the source of the leak and repair it. Fix the crack using a silicone caulk and make sure it is completely dry before the next use.
How To Fix Shower Stall Leaking In Corner
Determine the Source of the Leak.
If the shower stall is leaking in a corner of the bathroom, then the source of the problem is the corner wall.
The majority of customers will need a repair where the caulking has deteriorated over time between the wall and the bathtub’s acrylic shell; this is most commonly in the corners where the walls meet the tub/shower walls.
This will start to indicate where you may need to look to find the source(s) of the leaks if the sealant is not properly installed/adhered to the wall(s) and/or if the caulking has deteriorated over time from the constant heat.
To repair the leak, you will need to remove the old caulking with a utility knife or razor knife and replace it with new sealant around the entire perimeter of the tub/shower unit.
If you apply silicone caulk to the cracked area on the corner, it will stop the water leak from that cracked area to the other areas in the bathroom.
Take your time investigating the bathtub walls and finding the leaks.
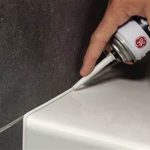
Fill the Gap With Silicone Caulk.
You will now start to apply the silicone caulk to the gap and fill it completely with silicone sealant before it becomes hard.
To do this right, you’ll need two people to hold the fixture still while you apply the caulk so that it doesn’t move while it cures.
This will guarantee that the gaps around the fixture are completely filled without air pockets that will collect water over time and eventually cause new leaks to appear after the surface cures.
Waterproof silicone caulk is not recommended for these areas; instead, use a latex/acrylic based product as it will not fail when exposed to moisture like traditional latex products will.
This must hold correctly and firmly in place before reassembly can occur.
Once the silicone caulk has fully hardened, you can put the bathroom fixtures back together again.
This will guarantee that it will last for many years without any more leaks appearing in the future.
Allow the Caulk to Dry.
After using the silicone caulk to reseal the shower stall, you should let it dry completely for 24 hours before using the bathroom again.
This will take about 2 days for the surface to cure fully, and you will have a new waterproof seal between the acrylic shell and the bathroom tiles that will last for many years without any more problems appearing.
It may take longer in certain circumstances, and you may have to apply a second coat of sealant depending on how porous the surface is.
This depends on how much water and moisture have been in contact with the wall over the years.
You don’t want to turn on a shower and find that there is leakage from behind the tile work; this will cause mold to grow and damage your wall structure permanently if it is not repaired quickly.
Be patient and let the first coat cure before you apply the second coat if the first application did not cover all of the cracks/gaps.
It will guarantee that the breach is sealed properly, and you can continue to use your bathroom without the fear of a leak appearing at any time in the future.
Evaluate The Shower Stall
The last step is to check the shower stall carefully to see if any of the original caulking is missing or no longer works.
To test the fixture, you will need to fill a plastic bag with water and place it behind the tilework to see if it will leak through the tiles onto the floor of the bathroom.
Allow a little trickle of water to escape from the plastic bag, and then watch the tiles for signs of seepage.
It will do a great job of finding places where the caulking needs to be redone or where it has already failed.
This will save you a lot of time in the long run, as you won’t have to re-caulk the entire bathroom again in the near future if the caulking fails prematurely.
You may continue to do this every couple of years in order to keep a tight seal around the fixture and prevent any water from seeping through and causing damage to your wall structure or flooring.
This will allow you to save a lot of money in the long term by not having to replace all of your flooring if the water leaks into the wall cavity, causing a lot of water damage to the walls.
How Can I Figure Out Where the Leak in My Shower Is Coming From?
Pour water around the door frame if you have a shower door. Allow at least five minutes for the water to leak out.
If your door has these, look for holes between the rubber door sweeps or gaskets.
Also, if the shower door is caulked to the wall or the floor, search for holes there as well.
How Long Should the Seal on a Shower Screen Last?
A good sealant may last up to a year, depending on where you live and how frequently you use the shower.
If your sealant gets moldy and you are unable to clean it, replace it immediately to prevent potential leaks.
Do You Seal the Inside of a Shower Enclosure?
Only the exterior of the enclosure should be sealed with a silicone-based sealant.
If silicone is put on the inside, water that may have leaked through or around the door seal could cause damage to the wood framing of the enclosure and mildew growth on the wooden panels.
Also Read: What Causes Electric Shock From Water Pipes?
Final Words
When the shower stall leaks, it can be annoying and get in the way of your daily life. It can also waste hundreds of gallons of water every year.
When a shower stall leaks from the corner, locate the source of the leak, replace the old caulking with a new one, and then test the shower to see if any further repairs are required.
After the examination, most individuals will reseal their showers to prevent any more water leaks from occurring in the future.
The most crucial duty that you have as a homeowner is to regularly inspect the shower and check for any signs of leakage before it is too late to repair the damage.
Choose a watertight silicone-based caulk to seal your showers and baths on a regular basis to prevent the water from leaking out and wasting your money and energy on unnecessary repairs in the future.
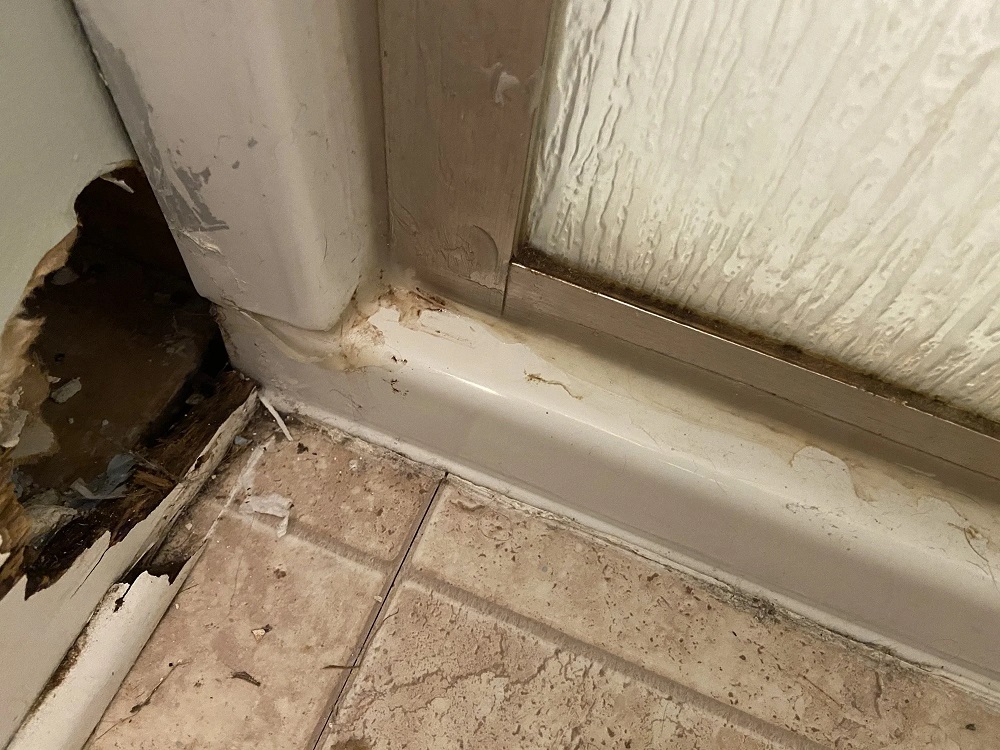
You don’t want it to get to a point where your bathroom starts to look like this.
Take your time applying it, and make sure you have good ventilation while you work.